This is my final Animation for my Second Year Minor Project at Glamorgan University at the ATRiuM.

Showing posts with label Second Year Minor Project. Show all posts
Showing posts with label Second Year Minor Project. Show all posts
Tuesday, 12 February 2013

I Doubt He Reads That Much
Set
If you look closely at all those books you might just see your name... No? Guess you're just not a stopmoer then (Mr Cox being the exception) I wrote all my class mates names on the books just for a laugh and tried to come up with my own A113. The books where made from small segments of balsa wood covered in loose canvas and painted with acrylic paint. The cupboards were also made from balsa wood and the handles from black sculpey.

I also slipped in a little teaser for my short film coming to town 2013.

Everything on the shelves was made from Fimo Air Dry. I really disliked this material as it shared no similarities in texture or through how you could manipulate it to anything I've worked with before, be it clay plasticine Sculpey. Its an odd material you'll have to have a play with it yourself to understand what I mean, I only used it as it was free from a tutor and doubt I'll be using it in the future. everything on the shelves are items this teacher has picked up on their travels, its loosely based on my old art room from Secondary School and the teacher is an eerie echo of my old art teacher (Although she was a woman). The shelves where made from balsa wood and painted in acrylic paint.


The door handle and window were made from Sculpey and painted with acrylic paint. The door itself was a piece of wood covered in a sticker material with a wood effect pattern on it. The skirting boards and door frame are made from balsa wood painted with acrylic paint.


Finally there was a slot cut into the back of my set to allow a rig to go into the back of my model without being in shot. This would allow me to make my character jump and not have all the nasty work of having to remove a rig frame by frame when editing my film together.


This is my favourite still from my Final Film, I just love how the arms and hands are positioned. It also shows off how well I hid that rig!

One Born Every Minute
Final Model


And Hey Presto! He's alive.
Little Girl

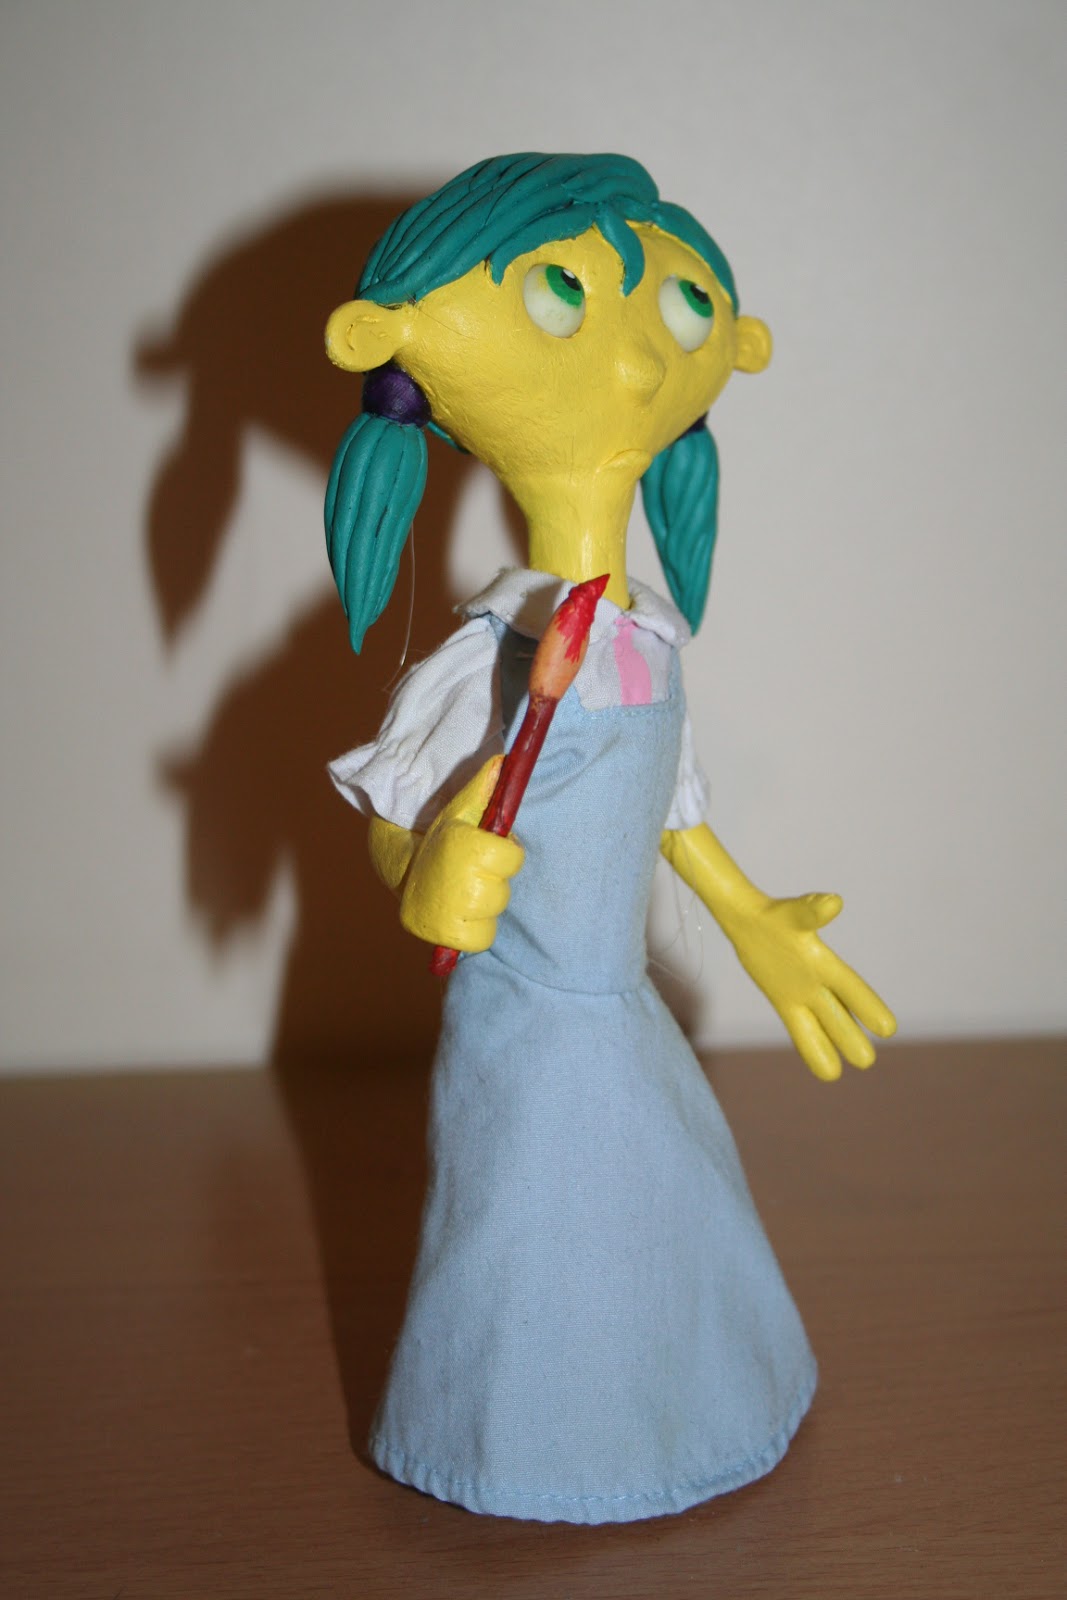


The little girl was sculpted completely out of Sculpey and painted with acrylic paints. I made her in four sections, her head, her left arm, her right arm and her chest and legs. Her chest and legs where made into a solid lump and a coin was glued to the bottom to allow me use a magnet to secure her in one place while filming.
Close ups


What's a Man Without His Head?
Head

So I begun creating my head by first sculpting it out of Sculpey, gotta love that Sculpey. The image above shows the next process I did which was to spray my character blue with aerosol spray paint. Why blue I hear you ask? Why not! If you can then you should, don't do in animation what you can do in live action I say.


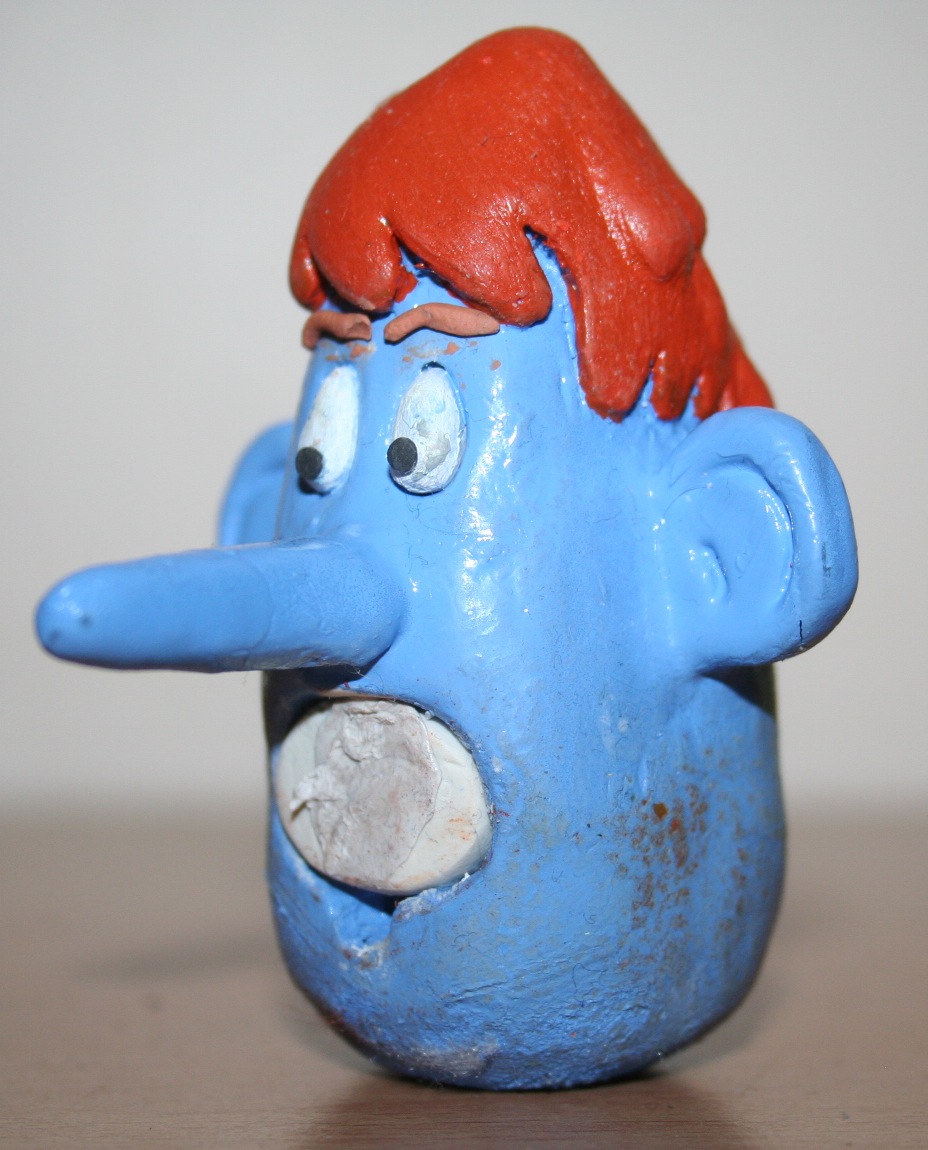
The final head from all angles is shown above the dirt marks are from wear and tear as these photos were taken after my final animation was completed.
Mouth Shapes

The mouth shapes above are my initial mouths however after doing a lip sync test and speaking to my tutors we both agreed that they were to square and there wasn't enough variation in size. So I went away and created the mouth shapes you see below which are softer and have more variety.

As Sloth would say "HEEEEEY YOU GUUUUUYS!!!"

Clothes
Trousers


 I made small buttons out of Black Sculpey. Rolling the Sculpey into tiny balls then flattening them with a flat sculpting tool, I then punched little holes into them with a needle.
The belt buckle! This was a lucky find which I had laying around in a box of old nitbits and instantly knew that my art teacher would have to wear it in some form or another. I painted over the gold with acrylic paint to try and give it a brassy effect and keep the colour within the spectrum of my piece. It was to gold and shinny for my liking originally.


All excess material was folded over and glued to the padding to help keep the trousers in place when animating.

Shirt

Masking tape and cling film were also used in helping me create my shirt, as shown on the image above. The material for my shirt is from a handkerchief I found in a charity shop and instantly wanted my character to be wearing it! Always keep an eye out for things like this you never know when they might come in use.


The collar was made separate to the shirt and fits tightly around my characters head, I found the collar very hard to create as my character has no neck it is just instant head from the shoulders. Making the collar separate from the shirt meant it moved a lot while I was animating so I decided to eventually glue it to the head.

The pocket on the shirt is a piece of fabric which had been cut out and glued on (Above). The shirt also had to make room for the rig in my characters back so a tiny slit was made to allow it to poke out.


Subscribe to:
Posts (Atom)